Alice Gets a Mobile Agent! 
In this demo, we'll again use our familiar Faber ACA-Py agent to issue credentials to Alice, but this time Alice will use a mobile wallet. To do this we need to run the Faber agent on a publicly accessible port, and Alice will need a compatible mobile wallet. We'll provide pointers to where you can get them.
This demo also introduces revocation of credentials.
Contents 
- Getting Started
- Get a mobile agent
- Running Locally in Docker
- Running in Play With Docker
- Run an instance of indy-tails-server
- Run
faberWith Extra Parameters - Accept the Invitation
- Issue a Credential
- Accept the Credential
- Issue a Presentation Request
- Present the Proof
- Review the Proof
- Revoke the Credential and Send Another Proof Request
- Send a Connectionless Proof Request
- Conclusion
Getting Started
This demo can be run on your local machine or on Play with Docker (PWD), and will demonstrate credential exchange and proof exchange as well as revocation with a mobile agent. Both approaches (running locally and on PWD) will be described, for the most part the commands are the same, but there are a couple of different parameters you need to provide when starting up.
If you are not familiar with how revocation is currently implemented in Hyperledger Indy, this article provides a good background on the technique. A challenge with revocation as it is currently implemented in Hyperledger Indy is the need for the prover (the agent creating the proof) to download tails files associated with the credentials it holds.
Get a mobile agent
Of course for this, you need to have a mobile agent. To find, install and setup a compatible mobile agent, follow the instructions here.
Running Locally in Docker
Open a new bash shell and in a project directory run the following:
git clone https://github.com/hyperledger/aries-cloudagent-python.git
cd aries-cloudagent-python/demo
We'll come back to this in a minute, when we start the faber agent!
There are a couple of extra steps you need to take to prepare to run the Faber agent locally:
Install ngrok and jq
ngrok is used to expose public endpoints for services running locally on your computer.
jq is a json parser that is used to automatically detect the endpoints exposed by ngrok.
You can install ngrok from here
You can download jq releases here
Expose services publicly using ngrok
Note that this is only required when running docker on your local machine. When you run on PWD a public endpoint for your agent is exposed automatically.
Since the mobile agent will need some way to communicate with the agent running on your local machine in docker, we will need to create a publicly accesible url for some services on your machine. The easiest way to do this is with ngrok. Once ngrok is installed, create a tunnel to your local machine:
This service is used for your local aca-py agent - it is the endpoint that is advertised for other Aries agents to connect to.
You will see something like this:
Forwarding                    http://abc123.ngrok.io -> http://localhost:8020
Forwarding                    https://abc123.ngrok.io -> http://localhost:8020
This creates a public url for ports 8020 on your local machine.
Note that an ngrok process is created automatically for your tails server.
Keep this process running as we'll come back to it in a moment.
Running in Play With Docker
To run the necessary terminal sessions in your browser, go to the Docker playground service Play with Docker. Don't know about Play with Docker? Check this out to learn more.
Open a new bash shell and in a project directory run the following:
git clone https://github.com/hyperledger/aries-cloudagent-python.git
cd aries-cloudagent-python/demo
We'll come back to this in a minute, when we start the faber agent!
Run an instance of indy-tails-server
For revocation to function, we need another component running that is used to store what are called tails files.
If you are not running with revocation enabled you can skip this step.
Running locally in a bash shell?
Open a new bash shell, and in a project directory, run:
git clone https://github.com/bcgov/indy-tails-server.git
cd indy-tails-server/docker
./manage build
./manage start
This will run the required components for the tails server to function and make a tails server available on port 6543.
This will also automatically start an ngrok server that will expose a public url for your tails server - this is required to support mobile agents. The docker output will look something like this:
ngrok-tails-server_1  | t=2020-05-13T22:51:14+0000 lvl=info msg="started tunnel" obj=tunnels name="command_line (http)" addr=http://tails-server:6543 url=http://c5789aa0.ngrok.io
ngrok-tails-server_1  | t=2020-05-13T22:51:14+0000 lvl=info msg="started tunnel" obj=tunnels name=command_line addr=http://tails-server:6543 url=https://c5789aa0.ngrok.io
Note the server name in the url=https://c5789aa0.ngrok.io parameter (https://c5789aa0.ngrok.io) - this is the external url for your tails server. Make sure you use the https url!
Running in Play with Docker?
Run the same steps on PWD as you would run locally (see above). Open a new shell (click on "ADD NEW INSTANCE") to run the tails server.
Note that with Play with Docker it can be challenging to capture the information you need from the log file as it scrolls by, you can try leaving off the --events option when you run the Faber agent to reduce the quantity of information logged to the screen.
Run faber With Extra Parameters
Running locally in a bash shell?
If you are running in a local bash shell, navigate to The demo directory and run:
TAILS_NETWORK=docker_tails-server LEDGER_URL=http://test.bcovrin.vonx.io ./run_demo faber --aip 10 --revocation --events
(Note that we have to start faber with --aip 10 for compatibility with mobile clients.)
The TAILS_NETWORK parameter lets the demo script know how to connect to the tails server (which should be running in a separate shell on the same machine).
Running in Play with Docker?
If you are running in Play with Docker, navigate to The demo directory and run:
PUBLIC_TAILS_URL=https://c4f7fbb85911.ngrok.io LEDGER_URL=http://test.bcovrin.vonx.io ./run_demo faber --aip 10 --revocation --events
The PUBLIC_TAILS_URL parameter lets the demo script know how to connect to the tails server. This can be running in another PWD session, or even on your local machine - the ngrok endpoint is public and will map to the correct location.
Use the ngrok url for the tails server that you noted earlier.
*Note that you must use the https url for the tails server endpoint.
*Note - you may want to leave off the --events option when you run the Faber agent, if you are finding you are getting too much logging output.
Waiting for the Faber agent to start ...
The Preparing agent image... step on the first run takes a bit of time, so while we wait, let's look at the details of the commands. Running Faber is similar to the instructions in the Aries OpenAPI Demo "Play with Docker" section, except:
- We are using the BCovrin Test network because that is a network that the mobile agents can be configured to use.
- We are running in "auto" mode, so we will make no manual acknowledgements.
- The revocation related changes:
- The
TAILS_NETWORKparameter tells the./run_demoscript how to connect to the tails server and determine the public ngrok endpoint. - The
PUBLIC_TAILS_URLenvironment variable is the address of your tails server (must behttps). - The
--revocationparameter to the./run-demoscript activates the ACA-Py revocation issuance.
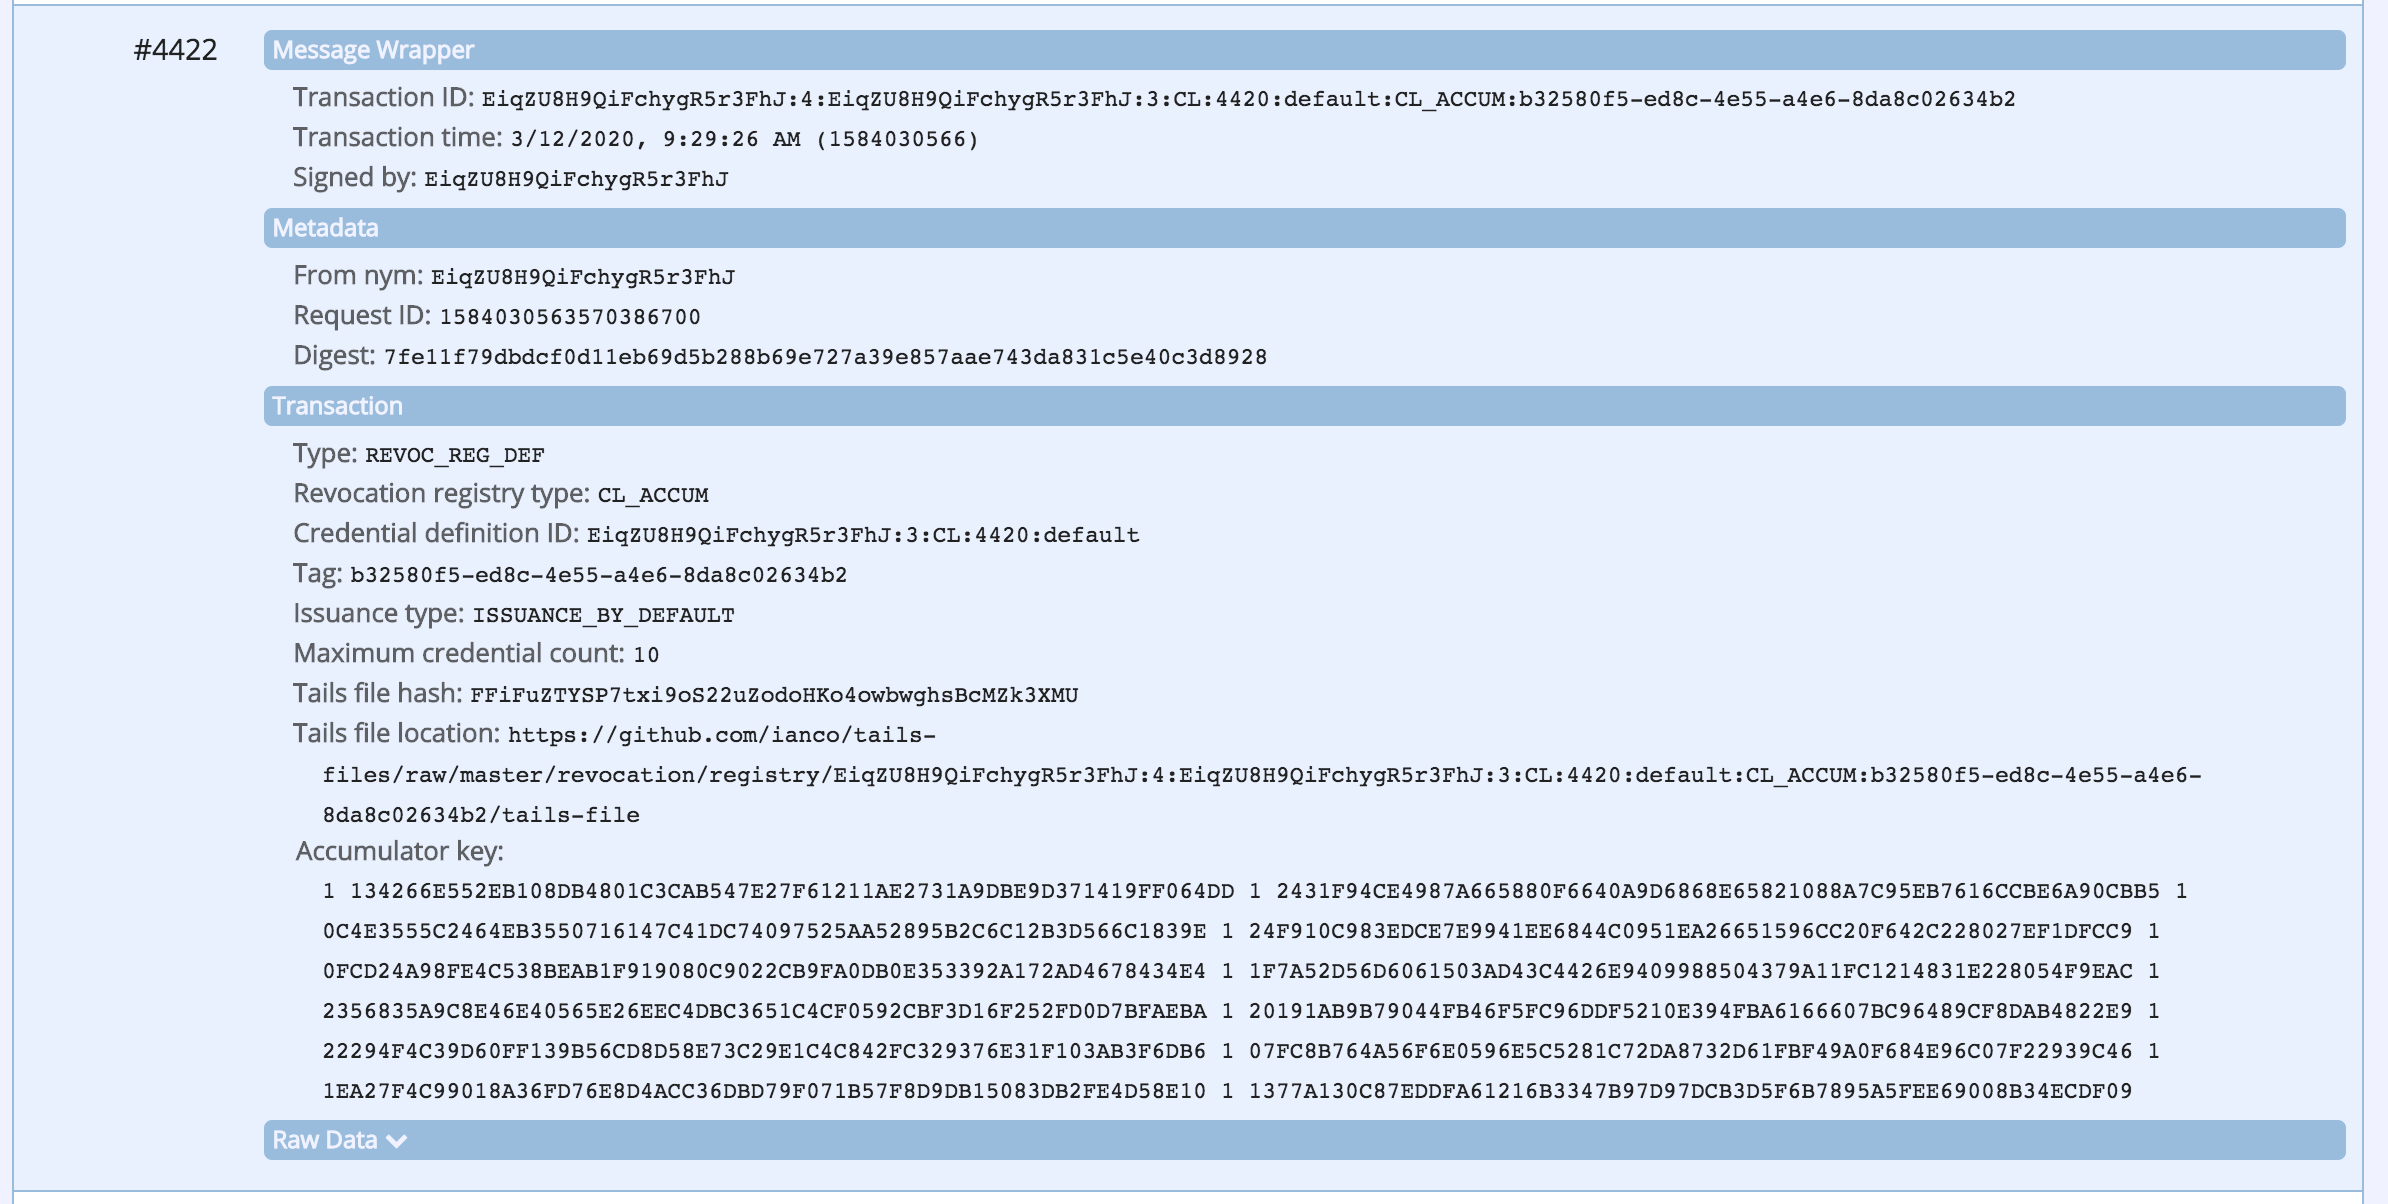
As part of its startup process, the agent will publish a revocation registry to the ledger.
Click here to view screenshot of the revocation registry on the ledger
Accept the Invitation
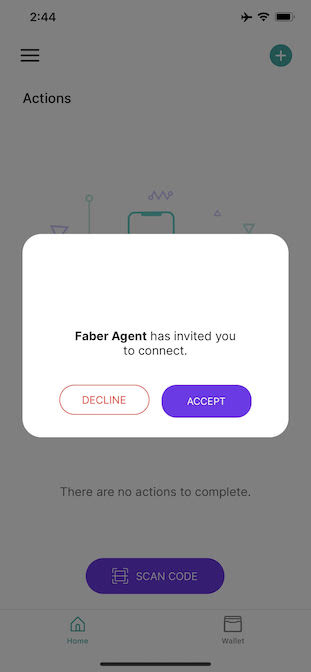
When the Faber agent starts up it automatically creates an invitation and generates a QR code on the screen. On your mobile app, select "SCAN CODE" (or equivalent) and point your camera at the generated QR code. The mobile agent should automatically capture the code and ask you to confirm the connection. Confirm it.
Click here to view screenshot
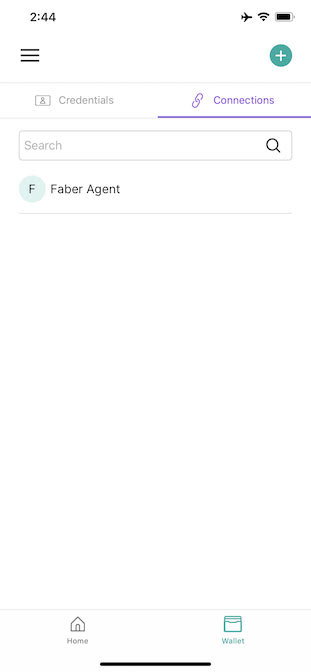
The mobile agent will give you feedback on the connection process, something like "A connection was added to your wallet".
Click here to view screenshot
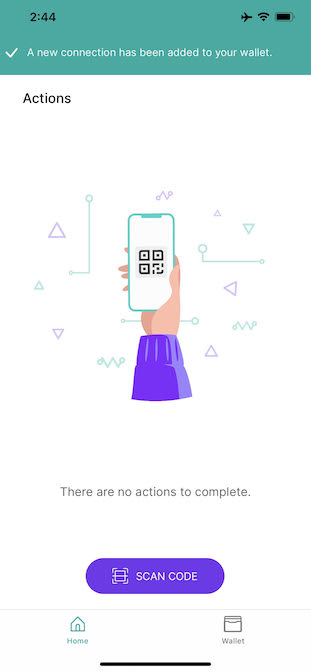
Click here to view screenshot
Switch your browser back to Play with Docker. You should see that the connection has been established, and there is a prompt for what actions you want to take, e.g. "Issue Credential", "Send Proof Request" and so on.
Tip: If your screen is too small to display the QR code (this can happen in Play With Docker because the shell is only given a small portion of the browser) you can copy the invitation url to a site like https://www.the-qrcode-generator.com/ to convert the invitation url into a QR code that you can scan. Make sure you select the URL option, and copy the invitation_url, which will look something like:
https://abfde260.ngrok.io?c_i=eyJAdHlwZSI6ICJkaWQ6c292OkJ6Q2JzTlloTXJqSGlxWkRUVUFTSGc7c3BlYy9jb25uZWN0aW9ucy8xLjAvaW52aXRhdGlvbiIsICJAaWQiOiAiZjI2ZjA2YTItNWU1Mi00YTA5LWEwMDctOTNkODBiZTYyNGJlIiwgInJlY2lwaWVudEtleXMiOiBbIjlQRFE2alNXMWZwZkM5UllRWGhCc3ZBaVJrQmVKRlVhVmI0QnRQSFdWbTFXIl0sICJsYWJlbCI6ICJGYWJlci5BZ2VudCIsICJzZXJ2aWNlRW5kcG9pbnQiOiAiaHR0cHM6Ly9hYmZkZTI2MC5uZ3Jvay5pbyJ9
Or this:
http://ip10-0-121-4-bquqo816b480a4bfn3kg-8020.direct.play-with-docker.com?c_i=eyJAdHlwZSI6ICJkaWQ6c292OkJ6Q2JzTlloTXJqSGlxWkRUVUFTSGc7c3BlYy9jb25uZWN0aW9ucy8xLjAvaW52aXRhdGlvbiIsICJAaWQiOiAiZWI2MTI4NDUtYmU1OC00YTNiLTk2MGUtZmE3NDUzMGEwNzkyIiwgInJlY2lwaWVudEtleXMiOiBbIkFacEdoMlpIOTJVNnRFRTlmYk13Z3BqQkp3TEUzRFJIY1dCbmg4Y2FqdzNiIl0sICJzZXJ2aWNlRW5kcG9pbnQiOiAiaHR0cDovL2lwMTAtMC0xMjEtNC1icXVxbzgxNmI0ODBhNGJmbjNrZy04MDIwLmRpcmVjdC5wbGF5LXdpdGgtdm9uLnZvbnguaW8iLCAibGFiZWwiOiAiRmFiZXIuQWdlbnQifQ==
Note that this will use the ngrok endpoint if you are running locally, or your PWD endpoint if you are running on PWD.
Issue a Credential
We will use the Faber console to issue a credential. This could be done using the Swagger API as we have done in the connection process. We'll leave that as an exercise to the user.
In the Faber console, select option 1 to send a credential to the mobile agent.
Click here to view screenshot
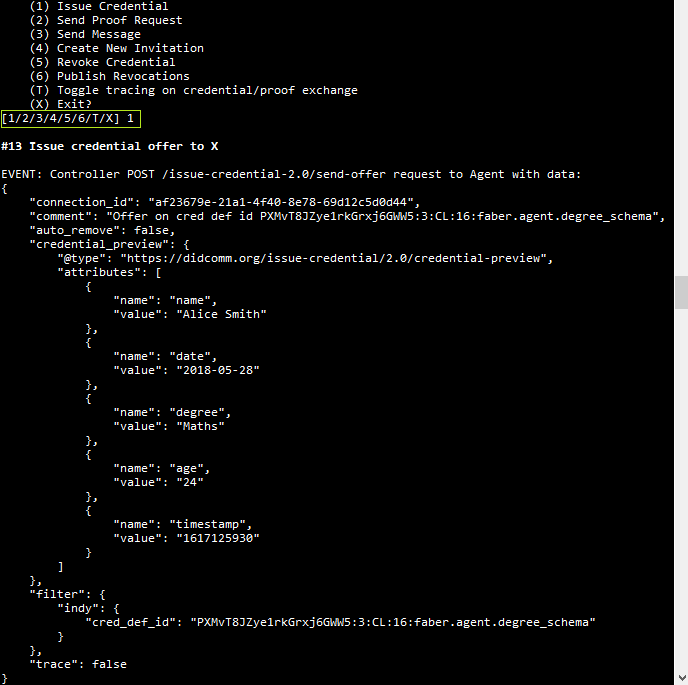
The Faber agent outputs details to the console; e.g.,
Faber      | Credential: state = credential-issued, cred_ex_id = ba3089d6-92da-4cb7-9062-7f24066b2a2a
Faber      | Revocation registry ID: CMqNjZ8e59jDuBYcquce4D:4:CMqNjZ8e59jDuBYcquce4D:3:CL:50:faber.agent.degree_schema:CL_ACCUM:4f4fb2e4-3a59-45b1-8921-578d005a7ff6
Faber      | Credential revocation ID: 1
Faber      | Credential: state = done, cred_ex_id = ba3089d6-92da-4cb7-9062-7f24066b2a2a
The revocation registry id and credential revocation id only appear if revocation is active. If you are doing revocation, you to need the Revocation registry id later, so we recommend that you copy it it now and paste it into a text file or someplace that you can access later. If you don't write it down, you can get the Id from the Admin API using the GET /revocation/active-registry/{cred_def_id} endpoint, and passing in the credential definition Id (which you can get from the GET /credential-definitions/created endpoint).
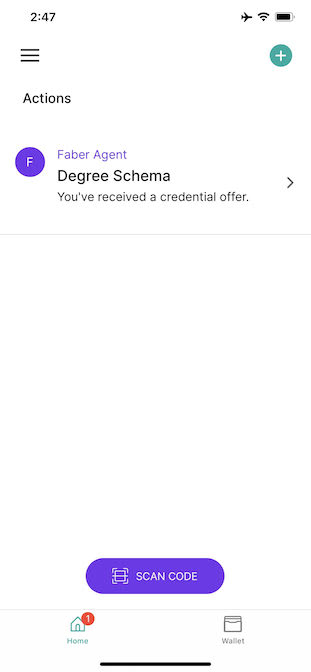
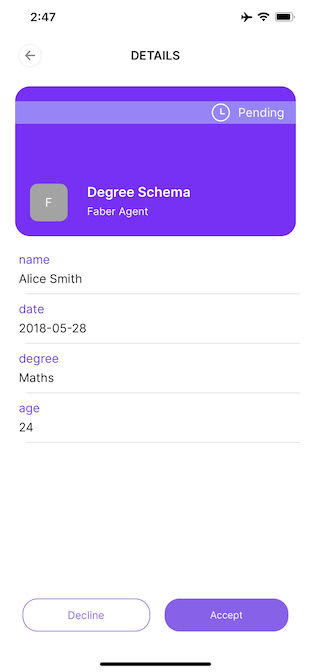
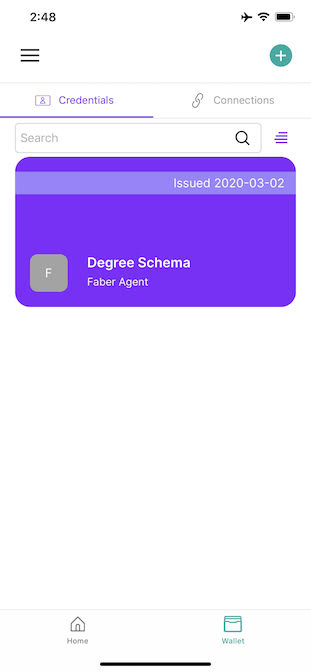
Accept the Credential
The credential offer should automatically show up in the mobile agent. Accept the offered credential following the instructions provided by the mobile agent. That will look something like this:
Click here to view screenshot
Click here to view screenshot
Click here to view screenshot
Issue a Presentation Request
We will use the Faber console to ask mobile agent for a proof. This could be done using the Swagger API, but we'll leave that as an exercise to the user.
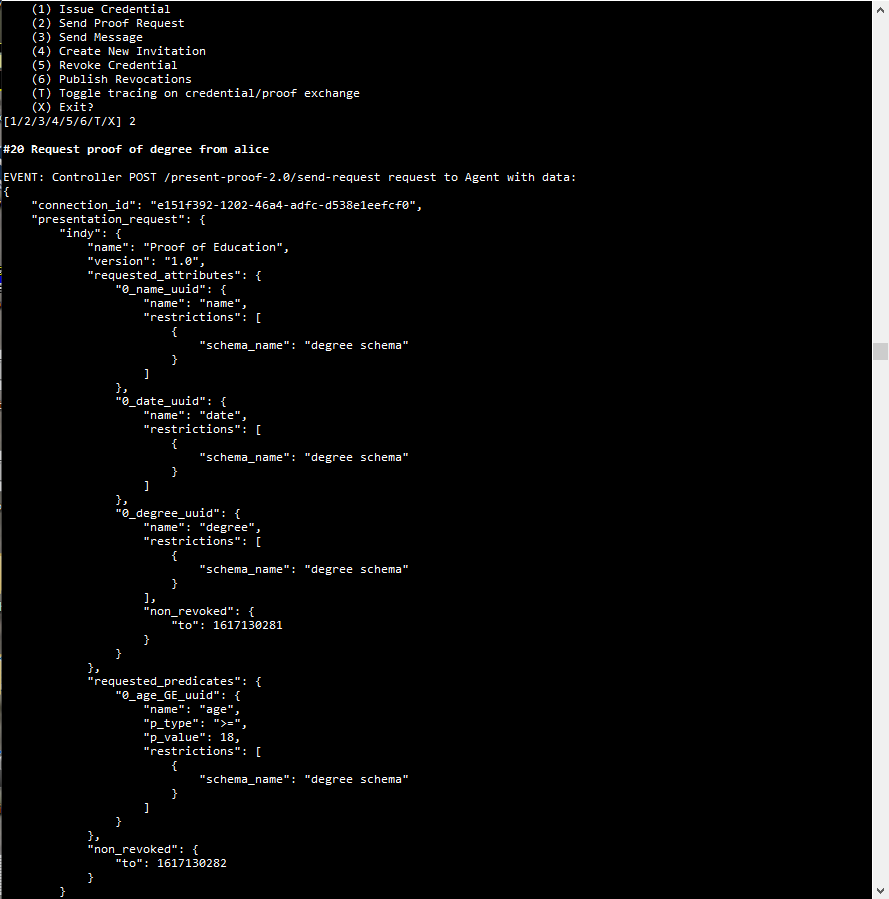
In the Faber console, select option 2 to send a proof request to the mobile agent.
Click here to view screenshot
Present the Proof
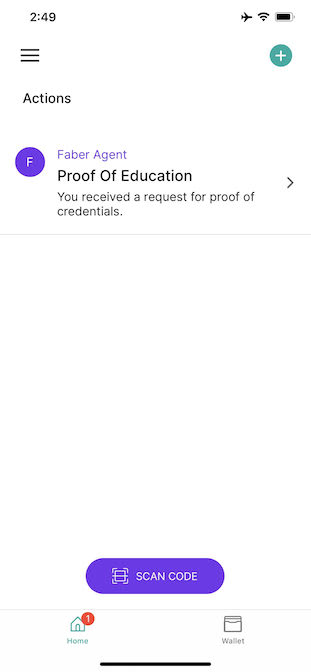
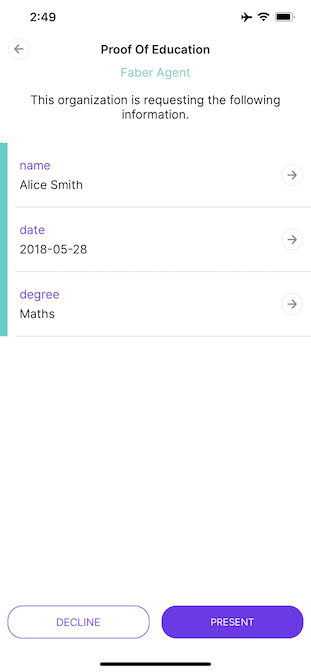
The presentation (proof) request should automatically show up in the mobile agent. Follow the instructions provided by the mobile agent to prepare and send the proof back to Faber. That will look something like this:
Click here to view screenshot
Click here to view screenshot
Click here to view screenshot

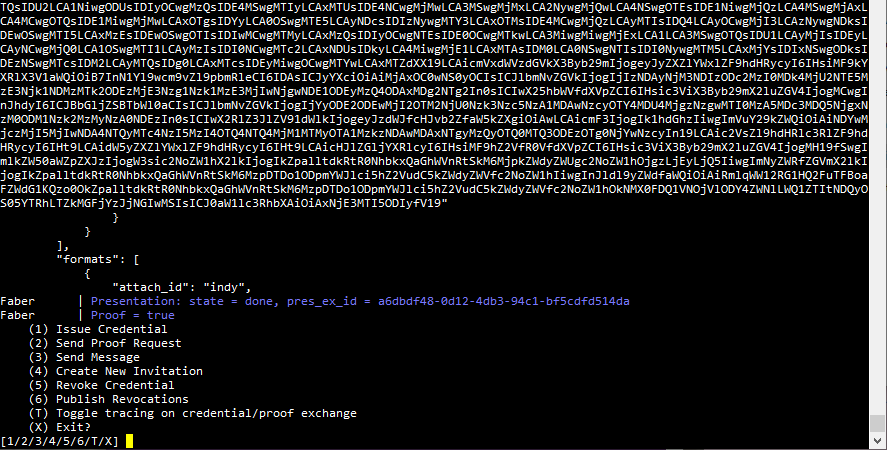
If the mobile agent is able to successfully prepare and send the proof, you can go back to the Play with Docker terminal to see the status of the proof.
The process should "just work" for the non-revocation use case. If you are using revocation, your results may vary. As of writing this, we get failures on the wallet side with some mobile wallets, and on the Faber side with others (an error in the Indy SDK). As the results improve, we'll update this. Please let us know through GitHub issues if you have any problems running this.
Review the Proof
In the Faber console window, the proof should be received as validated.
Click here to view screenshot
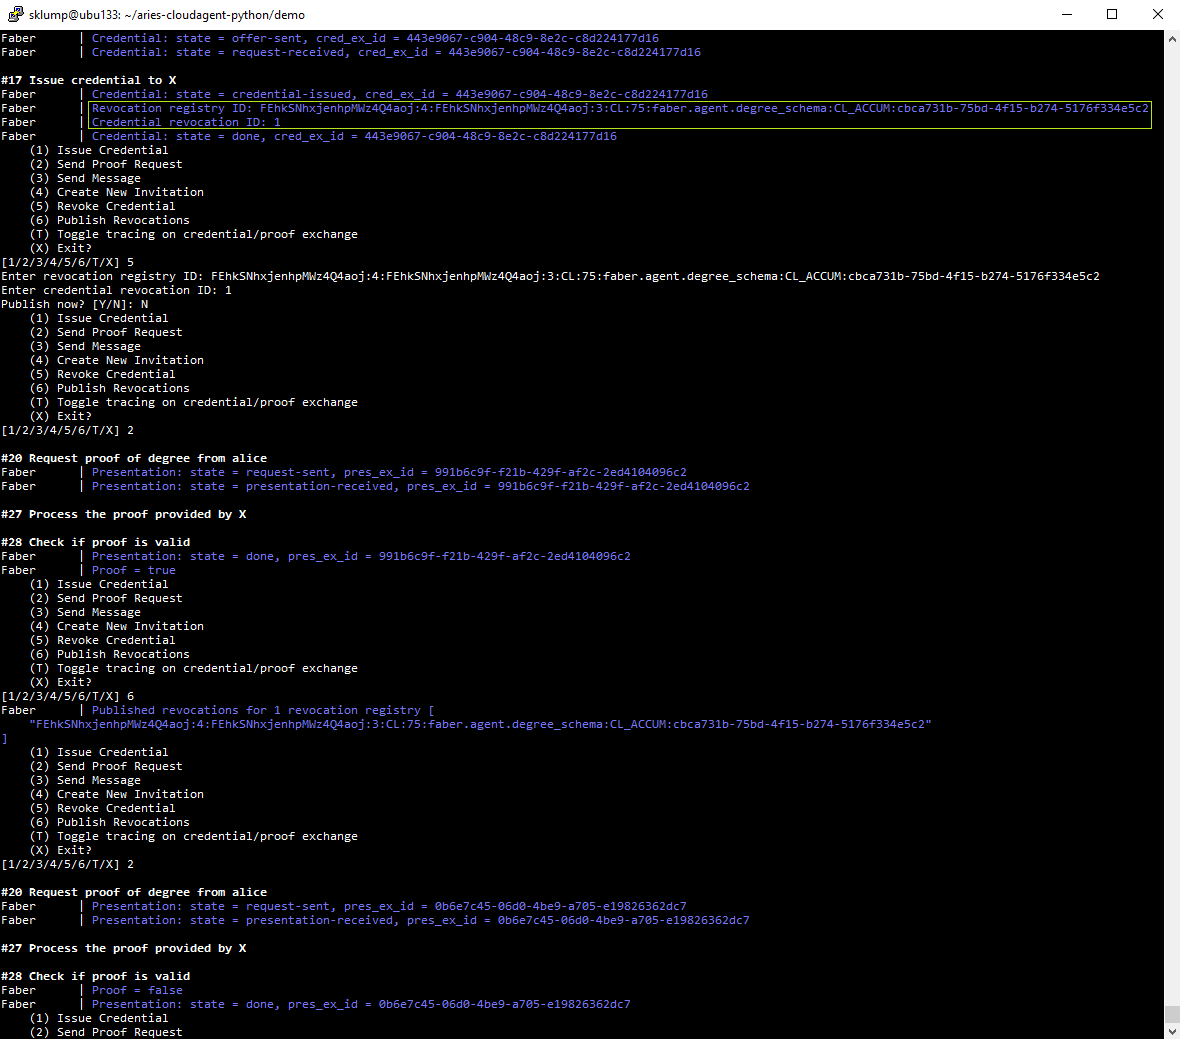
Revoke the Credential and Send Another Proof Request
If you have enabled revocation, you can try revoking the credential and publishing its pending revoked status (faber options 5 and 6). For the revocation step, You will need the revocation registry identifier and the credential revocation identifier (which is 1 for the first credential you issued), as the Faber agent logged them to the console at credential issue.
Once that is done, try sending another proof request and see what happens! Experiment with immediate and pending publication. Note that immediate publication also publishes any pending revocations on its revocation registry.
Click here to view screenshot
Send a Connectionless Proof Request
A connectionless proof request works the same way as a regular proof request, however it does not require a connection to be established between the Verifier and Holder/Prover.
This is supported in the Faber demo, however note that it will only work when running Faber on the Docker playground service Play with Docker. (This is because both the Faber agent and controller both need to be exposed to the mobile agent.)
If you have gone through the above steps, you can delete the Faber connection in your mobile agent (however do not delete the credential that Faber issued to you).
Then in the faber demo, select option 2a - Faber will display a QR code which you can scan with your mobile agent. You will see the same proof request displayed in your mobile agent, which you can respond to.
Behind the scenes, the Faber controller delivers the proof request information (linked from the url encoded in the QR code) directly to your mobile agent, without establishing and agent-to-agent connection first. If you are interested in the underlying mechanics, you can review the faber.py code in the repository.
Conclusion
That’s the Faber-Mobile Alice demo. Feel free to play with the Swagger API and experiment further and figure out what an instance of a controller has to do to make things work.